Soil Sampling For Residential Areas
ID
452-129 (SPES-725P)
 EXPERT REVIEWED
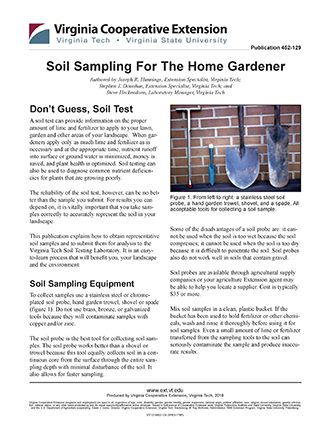
Don’t Guess, Soil Test
A soil test can provide information on the proper amount of lime and fertilizer to apply to your lawn, garden and other areas of your landscape. When applying only as much lime and fertilizer as is necessary and at the appropriate time, nutrient runoff into surface or ground water is minimized, money is saved, and plant health is optimized. Soil testing can also be used to diagnose common nutrient deficiencies for plants that are growing poorly.
The reliability of the soil test, however, can be no better than the sample you submit. For results you can depend on, it is vitally important that you take samples correctly to accurately represent the soil in your landscape.
This publication explains how to obtain representative soil samples and to submit them for analysis to the Virginia Tech Soil Testing Laboratory. It is an easy to learn process that will benefit you, your landscape and the environment.
Soil Sampling Equipment
To collect samples use a stainless steel or chrome-plated soil probe, hand garden trowel, shovel or spade (figure 1). Do not use brass, bronze, or galvanized tools because they will contaminate samples with copper and/or zinc.

The soil probe is the best tool for collecting soil samples. The soil probe works better than a shovel or trowel because this tool equally collects soil in a continuous core from the surface through the entire sampling depth with minimal disturbance of the soil. It also allows for faster sampling.
Some of the disadvantages of a soil probe are: it cannot be used when the soil is too wet because the soil compresses; it cannot be used when the soil is too dry because it is difficult to penetrate the soil. Soil probes also do not work well in soils that contain gravel.
A variety of soil probes are available for purchase online and at agricultural supply stores for a wide range in price, starting at $15.
Mix soil samples in a clean, plastic bucket. If the bucket has been used to hold fertilizer or other chemicals, wash and rinse it thoroughly before using it for soil samples. Even a small amount of lime or fertilizer transferred from the sampling tools to the soil can seriously contaminate the sample and produce inaccurate results.
In addition to these tools, if you plan to submit your sample to the Virginia Tech Soil Testing Laboratory, you will need a Soil Sample Information Sheet and a Soil Sample Box. Submit sample information by going to https://www.soiltest.vt.edu/ and setting up an account. The lab's sample box is available from your county or city's Virginia Cooperative Extension (VCE) office. To locate the VCE office nearest you, go to https://ext.vt.edu/offices.html. When sending in only one or two samples, it is acceptable to place about a cupful of soil into a plastic resealable bag. When more than one sample, use a permanent marker to write the Sample ID on the bag. Do not place any paper inside the sample container along with the soil.
When And How Often To Sample
When is the best time to take soil samples? Take a soil sample a few months before initiating any new landscaping whether it be seeding a lawn, starting a vegetable garden, putting in a flower bed, or planting perennials. Sampling well in advance of planting will allow time for applied soil amendments to begin making the desired adjustments in soil pH or nutrient levels.
Sample established areas lawns, trees, shrubbery, and other perennials at any time of year; however, an ideal time to take samples is when the garden season has ended in the late summer to early fall. Sampling in the fall allows time for corrective pH and nutrient management before new growth starts in the spring. Fall sampling also avoids busy spring period at the Soil Testing Laboratory, thus avoiding delays in getting your soil test results.
If an established area exhibits abnormal growth or plant discoloration, take a soil sample right away. For areas recently limed or fertilized, delay sampling at least six to eight weeks.
A soil sample is a composite of numerous sub-samples, so a soil that is too wet will be impossible to mix together. As a rule, if the soil is too wet to work (or is good for making mud pies), it is too wet to sample. Another way to judge is to squeeze soil into a ball. If it easily breaks apart, then the soil can be sampled.
How often should a soil be tested? If you live in the Coastal Plain region and have sandy soils, it is best to test every two to three years. The sandy soils in that region do not hold nutrients as long as soils in the other parts of the state and are more likely to become acid through the addition of nitrogen. The nutrient levels in the silt and clay loam soils of the Piedmont and Mountain regions change less rapidly with lime and fertilizer applications. In these areas, soil testing once every three to five years is usually sufficient.
Where To Sample
To obtain an accurate soil sample, divide your landscape into areas of unique use, i.e., a vegetable garden, lawn, perennial flower bed, etc., and to sample those unique areas individually. However, occasionally one of these unique landscape areas will be made up of one or more distinctly different soils. These soil differences may not be evident to the untrained eye, but different soils can have different chemical and physical properties which will result in differences in plant growth. You will need to take your soil sample in a way that will take into account the distinctly different soils that may exist in your landscape.
A sample that contains soil from more than one soil type will reflect a mixture of the characteristics of each soil and therefore not correctly represent either particular soil. So a soil sample that results from mixing distinctly different soils may result in fertilizer and lime recommendations that might be high for one of the soil types and low for another.
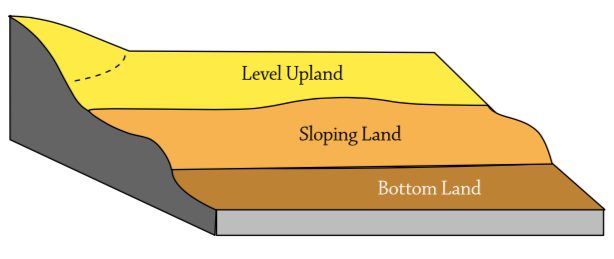
How can you tell if your landscape area has uniform soils? Here are a few clues. First, you can expect differences in soils due to vastly different landscape positions (figure 2), i.e., hilltops versus steep slopes versus poorly drained bottom areas as in figure 2. Sample each area separately.
A second way that different soils may be evident is by differences in soil color. As in figure 3, a predominantly yellow topsoil will likely have different characteristics than a topsoil that is dark brown in color. The eroded area will have different characteristics than either of the other two soils.

Soil texture is a third factor that may indicate differences in soils. A sandy soil will have different properties than a loam or a clay soil. Appendix 1 describes a method you can use to determine the texture of your soils. For most small landscapes, it will be unusual to find soils with significantly different soil textures. However, severely eroded areas and soils disturbed during building construction are two examples of how human activities may have left soils with different textures in your landscape.
A fourth factor to consider in your landscape are those areas which have had different treatments, perhaps by you or a previous landowner. For example, different treatments exist if your lawn contains two different turf types such as fescue in the front yard and bermudagrass in the back yard. Different treatments exist if you have a portion of a landscaped bed that has consistently received greater amounts of fertilizer or other soil amendment than another portion of the bed.
Different treatments will result in different properties that should be accounted for by sampling the different areas separately.
What’s the bottom line? To collect an accurate soil sample that is representative of your landscape, you must, as much as possible, sample from areas that are uniform. So look for changes in soil landscape position, soil color, texture, and treatments to divide areas into separate samples. If there are no evident differences, then sample by unique use areas, i.e., lawn, vegetable garden, orchard, etc.
Where Not To Sample
When collecting samples, avoid small areas where the soil conditions are obviously different from those in the rest of the landscape. For example, in figure 4, your sample should not include soil from the low, wet spot.
Also, avoid yard or landscape area borders, ditch banks, old brush piles, burn sites, severely eroded areas, old building sites, fence rows, pet dropping and urine spots, etc. Since soil taken from these locations would not be typical of the soil in the rest of the landscape area, including them could produce misleading results.
Soil Sampling As A Diagnostic Tool
If one area of your landscape seems healthy and another area has bare or yellow areas or yields poorly, soil sampling may help to diagnose the problem. Where poor growth exists and this area is large enough to manage separately, then separate composite samples should be taken from both poor and good areas. By comparing the results, the soil test may point out troubles that exist due to a lack of, or an excess of, nutrients and/or an incorrect pH. However, it should be pointed out that other factors may have a greater influence on plant growth that will not be accounted for by a soil test. These include soil drainage, soil compaction, insects, diseases, rainfall, and other factors.
How To Take A Representative Soil Sample
The first thing you must know to collect a proper soil sample is the depth the sub-samples should be taken. The following table gives you recommended sampling depths for common landscape areas.
Recommended Sampling Depths
| Type of Planting | Recommended Depth |
|---|---|
| Established Lawns | 2-4 inches |
| Vegetable and flower gardens | 6-8 inches or tillage depth |
| Trees and shrubs | 6 inches |
Sample depths are measured from the soil surface downward. For lawns, sample to a depth of 4 inches, excluding any turf thatch. For vegetable and flower gardens, sample to the depth that you plan to incorporate lime or fertilizer, usually 6 to 8 inches. In mulched beds of trees and shrubs, remove any mulch or surface debris, then sample to a depth of 6 inches.
When sampling soil around established trees and shrubs, take sub-samples from an area near the trunk to the outer edges of the branches (the drip line). For a particular landscape area, it is best to use the same sampling depth from year to year so soil test values can be more accurately compared.
How To Take Soil Sub-Samples
We learned earlier that an accurate soil sample must be taken from uniform soil areas. Within that area a soil sample must be made up of multiple sub-samples. These sub-samples are mixed together to make up the composite soil sample for that area. This section describes how to take the soil sub-sample.
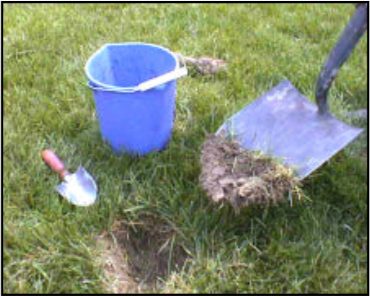
STEP 1: Open a hole with a shovel, spade or trowel from the surface to the proper depth for your landscape area (figure 4). Set that soil aside.
(If you are using a soil probe, insert it into the soil to the proper depth and remove the plug from the ground).
STEP 2: With your shovel or trowel remove a 1 inch thick slice from the smooth side of the open hole (figure 5).
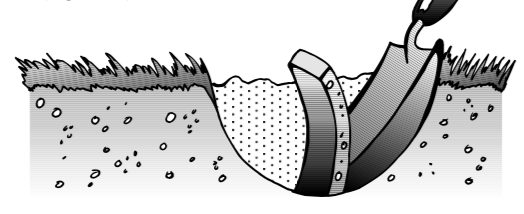
STEP 3: With the slice of soil on the blade of the shovel, remove the sides of the slice with a trowel (figure 6), knife or your hands to create a ribbon of soil 2 inches wide and 1 inch thick of the proper depth. Place the ribbon (or plug if using a soil probe) into a container.

STEP 4: Remove any surface mat of grass or litter and any rocks.
Place the soil in a clean bucket or container (figure 7).

Remember that a clean, plastic container is best.
STEP 5: Continue to take additional soil sub-samples from the uniform landscape area. By mixing these sub-samples together, you create the composite sample that will be sent to the Soil Testing Laboratory. The next section will explain how many sub-samples you should take for the composite sample.
Making The Composite Sample
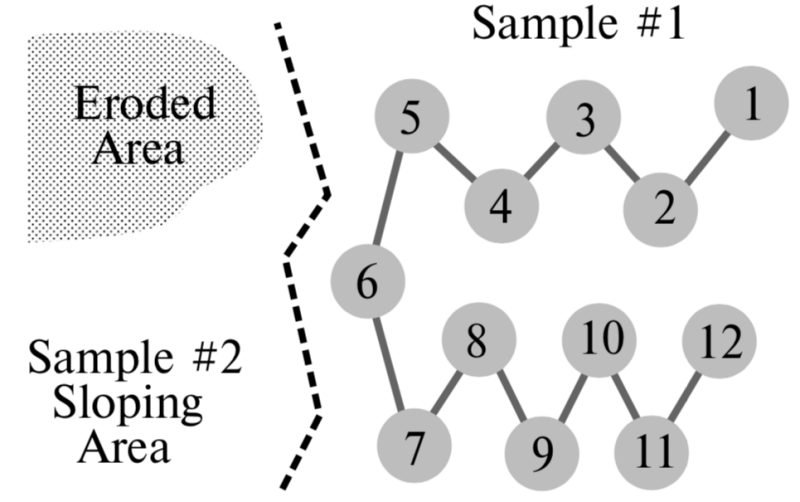
Take 10 or more sub-samples from different locations within each uniform sampling area to make a composite sample. Take the sub-samples in a random manner, such as with a zigzag pattern to minimize the variability that may be present in your sampling area. This allows you to obtain a reasonably representative soil sample.
In figure 9, composite sample #1 contains 12 sub-samples. Sample 2 should contain at least 10 sub-samples as well. You should avoid the eroded area when making composite samples #1 and #2. If it is large enough in size, a third composite sample could be collected from this area (figure 8).
The larger the area, the more sub-samples that are needed. The more sub-samples you take, the more representative your sample will be of your landscape area. When you realize that your 1/2 pound composite sample could represent thousands, or perhaps millions of pounds of soil, you can understand why proper sampling is so important.
When you have taken sufficient sub-samples from a uniform area, thoroughly mix the sub-sample slices or cores, breaking up clumps and removing all foreign matter such as roots, stalks, rocks, etc. Now you are ready to prepare the sample for the Soil Testing Laboratory.
Submitting the Sample to the Lab
Obtain free Soil Sample boxes from your local Virginia Cooperative Extension office, certain agribusinesses, and garden centers. Use permanent ink or pencil to label boxes.
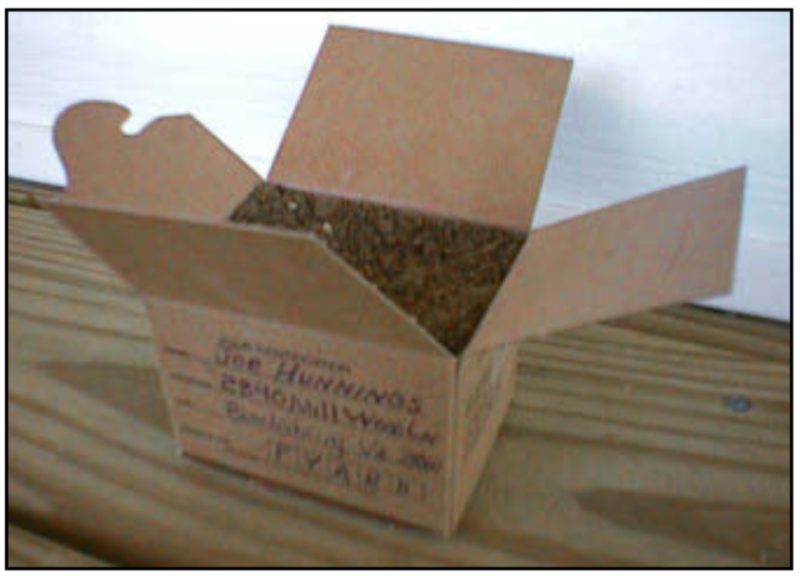
Fill the sample box completely with loose air-dried soil and label it with your name, and sample identifier (figure 9). Give the sample an identifier of up to five letters and/or numbers. Choose a unique identifier that will help you remember the area it corresponds to, such as FYARD, BYARD, ROSE2, or GARDN. Be sure to keep a record of the areas sampled with their corresponding identifier. This is particularly helpful if you are taking multiple samples.
Providing Information on Your Soil Sample(s)
Providing Information on Your Soil Sample(s) is an important part of the sample process. This can be done online at http://www.soiltest.vt.edu or at your local Virginia Cooperative Extension Office.
To get the most value from your soil test, take the time to provide information regarding your sample as completely and accurately as possible. Be sure to choose the correct plant code for each sample you submit.
Also, check to make sure that the sample identifier you provide corresponds to the identifier on the sample box and in your records. Costs for the various soil tests that are offered are listed. If you need assistance in providing sample information, contact your local Extension office.
Mail your soil filled container(s) along with a printed Submission Shipping Sheet from online and payment in a sturdy shipping box to the Virginia Tech Soil Testing Lab, 145 Smyth Hall (0465), 185 Ag Quad Ln., Blacksburg, VA 24061.
Results From the Soil Testing Laboratory
Soil samples at the Virginia Tech Soil Testing Laboratory are usually analyzed within one week of the time they are received. However, in early spring, processing the sample may take longer due to the large number of samples sent in by farmers at this time.
The Soil Testing Laboratory will provide you with information on the availability of nutrients in your soil. The routine soil test measures and makes recommendations for the following major nutrients: P ( phosphorus); K (potassium); Ca (Calcium); Mg (Magnesium) and five micronutrients. In addition, the routine test determines the soil pH and makes recommendations on how to raise or lower the pH. Less frequently needed tests that are available at an additional cost include organic matter and soluble salts.
A soil test is not performed for the presence of N (nitrogen) due to nitrogen’s potential for rapid changes in availability in the soil. The nitrogen recommendation is given based on years of research that has determined plant nitrogen needs.
When testing is complete, an email will be sent to you and an electronic copy is available to you and the Agriculture Extension Agent for your county or city. Supplemental notes are also available online at www.soiltest.vt.edu. The notes explain the technical terms used in the report and provide extra details on fertilizer application schedules and rates for specific kinds of plants. Feel free to contact your Extension office for more help on sampling, interpreting soil test results, and understanding how to implement them. Contact information for your local Virginia Cooperative Extension (VCE) office is available at https://ext.vt.edu/ offices.html.
Appendix 1: Soil Sampling For The Home Gardener Determining soil texture by feel

Virginia Cooperative Extension materials are available for public use, reprint, or citation without further permission, provided the use includes credit to the author and to Virginia Cooperative Extension, Virginia Tech, and Virginia State University.
Virginia Cooperative Extension is a partnership of Virginia Tech, Virginia State University, the U.S. Department of Agriculture (USDA), and local governments, and is an equal opportunity employer. For the full non-discrimination statement, please visit ext.vt.edu/accessibility.
Publication Date
August 18, 2025